Showing posts with label Christmas. Show all posts

Tuesday, 16 June 2015

Secret Santa


I'm in love with this page.

As well as trying to keep up to date with my scrapbooking, I'm also tracking backwards to old photographs. This one is not that old, only from 2013. 

This was my form's Secret Santa, and we all had so much fun over the Christmas pudding hat... Definitely one of the bet gifts given. I got sweets, which is unfortunate, because I'm actually not fond of sweets... sigh.

I had great fun constructing this page as I set myself a challenge to not use any patterned paper, and to just throw any type of Christmas motif at it. It ha Christmas trees, Christmas puddings (of course), snowflakes, holly, stars, sweets, candy canes... All in such bright colours! The end result is strangely cohesive... It embodies the chaos and wonder of Christmas for me.

Saturday, 18 April 2015

Jingle Bells


Yes, this is a shameless Christmas Selfie. Yes, I am wearing a wreath made of bells on my head. No, I am not insane. But, that wreath was surprisingly heavy, it hurt my neck for days...

I have my own self proclaimed Christmas tradition whereby every time we put the Christmas decorations up, I wear an item. In the past I have had tinsel scarves and bauble earrings. This year was the turn of a golden halo...

This background piece is gorgeous. The berries are holographic, it was almost too good to use. But then I found some red mirror card to match it... and, well, it was irresistible. A few other patterns to layer and a journalling card... tada! It makes me smile every time I see this page, mainly because that paper is so beautiful. When a pattern is that good, you let it do all of the talking.

Do you have any patterns in your stash like that?

Saturday, 26 April 2014

Oh Deer!

I made a promise last year to not buy any more Christmas stuff... but I caved. I fell head over heels in love with this tartan and knitted collection, and I just had to buy it! Also, they came in one of those Hobbycraft grab-bag things, so it was all co-ordinated  and matching, and half the price!


Here I layered two die-cuts, adding some holly leaves to one corner to spruce it up. I used an A5 corner-rounded card blank and the simplicity adds to the charm.
Also, how lovely are these stick on pearls?! I adore them! They just add a bit of luxury to any project, in my opinion.
 
Linking up with another Winter Wonderland challenge, this week called 'No Sentiment'.


Saturday, 19 April 2014

Easter Christmas-ness

I know, it's not quite right... but I'm not really an Easter person.
 
But I am a Christmas Person!
 
 
Yes. A Christmas Card in April.

 
In my defence, I have been hoarding this chipboard image for a long time (nearly 5 years I think!) and when the Winter Wonderland Challenge Blog posted the challenge o include a Robin, I really wanted to join in!
However I soon realised why I hadn't used the chipboard already - it's so small, but incredibly busy and intricately detailed, meaning that pretty much anything added to embellish it overpowered the delicacy of it.
So I tried to keep it simple.
I used a small card base, with rounded corners and positioned it off-centre. I then picked out the three main colours of the image and found matching buttons, and curved them to follow the circle.
It's very clean and simple, and not overpowering. Exactly what I was aiming for.


Friday, 6 December 2013

We Three Kings of Orient are...

...One in a taxi, one in a car.
One on a scooter, blowing its hooter,
Smoking a big Cigar.

I know. I sing wonderfully.


Equipment:
Gold Card blank
Paper scraps in Gold and black
Outline stickers
Glue

1) Trim a strip of Gold Card to the same height as the width of the Card Blank. 

2) Arrange three stickers of the headdresses (hats. I prefer hats, but they don't look like hats) onto this gold strip.

3) Attach to a strip of Black card that is the same height but 2cm wider.

4) Glue down the decorated strip, and arrange three sticker diamonds in the bottom corner.

Ta da!

Number of items used from stash: 2
Gold Card, Stickers

Wednesday, 4 December 2013

Sparkle

I love glitter,but hate the mess. Glitter outline stickers solve this problem no end.


Equipment:
White Card blank
Glitter stickers
Ribbon

1) Tie the Ribbon into a bow around the bottom of the card blank.

2) Arrange the glitter stickers onto the top half of the card.

Ta da!

Number of items used from stash: 2
Stickers, Ribbon

Monday, 2 December 2013

Button Red

A GREEN Card today...I've mainly been using white card this year, but I began to ran out,so in the spirit of using up my stash, I turned to this colour as well.


Equipment:
Green Card Blank
Patterned paper
Ribbon
Buttons
Felt star
Corner Rounder
Glue

1) Tie the ribbon around the patterned paper so that it forms a bow.

2) Attach a button to the centre of the felt star.

3) Glue the star onto the patterned paper, next to the ribbon bow.

4) Round the two corners of the patterned paper closest to the star, and attach the opposite flat edge to the front of the card.

5) Round the outside corners of the card blank and attach two more buttons to the side of the patterned paper.

Ta da!

Number of items used from stash: 6
Buttons, Paper, Ribbon, Star

Sunday, 1 December 2013

Christmas Green

Green and white looks so good together, and it makes a refreshing change to the usual red and green.


Equipment:
White Card Blank
Ribbon
Circle sentiment
Scalloped circle
Foam Pads

1) Attach the ribbon across the bottom half of the card and secure on the wrong side.

2) Using foam pads, layer the Circle sentiment onto the coordinating scalloped circle.

3) Adhere the scalloped circle on top of the ribbon using foam pads.

Ta da!

Number of items used from stash: 3
Ribbon, Sentiment, Circle

Friday, 29 November 2013

Circles

This one is plain and simple, and the cold blues go well with the white.


Equipment: 
White Card Blank
Circle embellishments
Border with words
Glue

1) Attach the border across the lowest third of the card blank using glue. Make sure that the writing is fully visible, as this will act as your sentiment.

2) Arrange the two circles on the card and glue down as well.

Ta da! So Simple, yet effective

Number of items used from stash: 3
Circles, border

Wednesday, 27 November 2013

Deck the halls...

...with boughs of holly!

A running theme that may start to occur with my cards is their simplicity. I find these sorts of ideas great if there are a lot of cards to make, or if you want a quick repeat design.


Equipment:
White Card Blank
Patterned paper
Ribbon
Glue
Outline Sticker Sentiment

1) Cut the patterned paper to half of the card blank. I chose this one as the holly appeared to hang from the centre. Adhere to the lower half of the card.

2) Tie a Coordinating ribbon into a bow across the front of the card, covering up the paper join.

3) Add an outline sticker sentiment on the plain top half  of the card.

Ta-da!

Number of items used from stash: 3
Paper, Ribbon, Sticker

Monday, 25 November 2013

Layers

More Christmas Cards this week! Yay!


Equipment:
White Card Blank
Paper Scraps: I had some handmade paper and that silver sort of netting stuff....
Paper Embellishments
Ribbon
Chipboard Sentiment
Glue
Foam Pads

1) Tear the handmade paper to fit onto the card blank. I found that using a paintbrush and water worked well. Glue down.

2)Tie the ribbon to the edges of the Chipboard sentiment and add foam pads.

3) Arrange the other elements to the card and stick down.

4) Adhere the chipboard sentiment with the foam pads.

Ta da!

Number of items used from stash: 6
Paper, Net, Snowflake, Star, Sentiment, Ribbon

Sunday, 24 November 2013

Baubles

This one is inspired by this card, and I love how simple it is! And, just one month to go! EEK!


Equipment:
White Card Blank
Bauble Die Cuts
Foam Pads
Black Pen
Corner Rounder

1) Using foam pads, arrange the two baubles on the front of the card.

2) Draw black lines for string and write greeting below.

3) Round corners of the card blank.

Ta da!

Number of items used from stash: 2
Bauble die cuts.

Friday, 22 November 2013

Ribbons

Another Christmas card to brighten up your November!


Equipment:
Square white card blank
Patterned paper
Ribbon bow
Card Scrap
Gold outline stickers
Glue

1) Trim patterned paper so that it sits with a 1cm border on the card blank. Glue down.

2) Wrap a ribbon bow (I kept mine from an old bunch of flowers) around one side of the card, and fix to the inside of the card using your preferred method (I like sticky tape).

3) Cut out the scrap of white card and round the end corners. Position the outline sticker greeting on it.

4) Glue the sentiment so that the end of the card is underneath the bow of the ribbon.

Ta Da!

Number of items used from stash: 3
Paper, Ribbon, Stickers

Wednesday, 20 November 2013

Candy Canes

Hello, Christmas cards again!

Look familiar? It is very similar to this one I did last year. A good example of where multiple ideas can spawn from the same items.


Equipment:
Square White Card blank
White Card
Patterned paper
Ribbon
Candy cane embellishment
Mini 'Christmas' tag
Foam pads
Glue

1) Trim the spare white card to a 10cm square.

2) Across one side, wrap the ribbon and secure at the back in your preferred method.

3) Attach the Candy Cane embellishment above the ribbon.

4) Adhere the mini tag where the candy cane crosses the ribbon.

5) Trim the patterned paper to a 13cm square, and glue onto the card front. Centre and attach the decorative panel using foam pads.

Ta Da!

Number of items used from stash: 4
Embellishment, Tag, Ribbon, Paper

Monday, 18 November 2013

Purple Snowflakes

Another Card to show you! Hoorah! 

This one turned out much better than I had expected. I'm usually pretty dire at anything like stamping, but this turned out really well, so smiles all round!


Equipment:
White Card Blank
Pink and White card
Pink Ribbon
Snowflake Embellishment
Snowflake Stamp
Inkpad
Foam adhesive

1) Using your stamp and Ink (my ink was purple), stamp onto the white card to create a background. Trim down to an 8X8cm square, and round the corners.

2) Wrap the ribbon around one side of the patterned card, and secure at the back with your favourite method ( I use tape).

3) Position and adhere your snowflake embellishment on top of the ribbon.

4) Trim the pink card to a 9cm square, and round its corners. Adhere the patterned panel to the pink square using foam pads. Attach all of this to the card blank, also with foampads.

Ta da!

Number of  items used from stash: 4
Snowflake embellishment, ribbon, pink card, stamp & ink

Sunday, 17 November 2013

Red and Gold

This year, I've set myself a challenge. I was only allowed to buy my stash one new thing for all of my Christmas cards. It been pretty tough, but I really like some of the results I've been getting. So I'm going to show you some of the things you can do, and let me know if, like me, you long for your huge pile of craft supplies to diminish (so you have a valid excuse to buy more!).

This one, I hate that the bow is lop-sided, but otherwise I feel it's a rather sophisticated card.

Equipment:
Gold Card Blank
Red Card
Gold patterned vellum (mine says Christmas over it)
Red Ribbon
Red Gems
Double sided tape
Foam Pads
Glue
Scissors

1) Trim the vellum until it measures 9cm X 10cm. Trim the red card to 10cm X 11cm.

2) Matt the vellum onto the red card using double sided tape.

3) Tie a bow with the red ribbon. Use Glue to secure the knot, and cut a pennant into each of the tail ends.

4) Glue the bow to the centre of the vellum piece. Attach this panel to the top of the card using foam pads.

3) Beneath this, glue 3 red gems for detail.

Ta da!

Number of items used from stash: 6
Ribbon,Vellum, Card Blank, Gems

Saturday, 16 November 2013

DIY: Decorated Tealights

Earlier this week, I was fortunate to guest post over at Running with a Glue Gun. I thought today I'd share the DIY I prepared here as well.

 I have these decorated tealights to show you, and they make great last minute gifts, just in time for Christmas. Also the colours and decorations are completely customisable,so you each one can be completely individual!


Equipment:
Tealight candles
Ribbon
Double Sided Tape

Optional:
Decoration such as gems, bows etc.
Glue Gun, Glue Dots or Super Glue (depending on strength and size)


Step 1: Check that your ribbon is not taller than your tealight, as this could potentially be a fire hazard.


Step 2: Attach enough double sided tape for the circumference of the tealight to the wrong side of the ribbon. Trim to a straight edge


Step 3: Take off the backing of the tape, and wrap around the tealight, trimming once all of the sides are covered


Optional: Decorate your tealights further using small embellishments, but keep in mind the potential hazard of lots of loose fabric.

Ta da!

Sunday, 25 August 2013

25th: Christmas Card 8

This is the last of my last year's Christmas Cards, I hope to get this year's done before this time next year!
 
Equipment:
White Card
Candy Cane embellishment
Corresponding Striped Paper
Foam Pads
Outline stickers
 
1) Fold the White card to an A5 Card Blank.
2) Trim another piece of white Card to fit the candy cane. Attach the candy cane with foam pads.
3) Trip a piece of the striped paper to matt the candy cane panel. I usually trim so that there is a 0.5 cm border around. Attach the panel with foam pads.
4) Arrange the stack of paper in the top right corner of the card and attach with foam pads.
5) Below, add a sticker with the words 'Christmas'

This one is simple but effective, I think. I like how the stripes match.

Sunday, 18 August 2013

Christmas To -Do List: Films to watch

 
The Polar Express
 
 
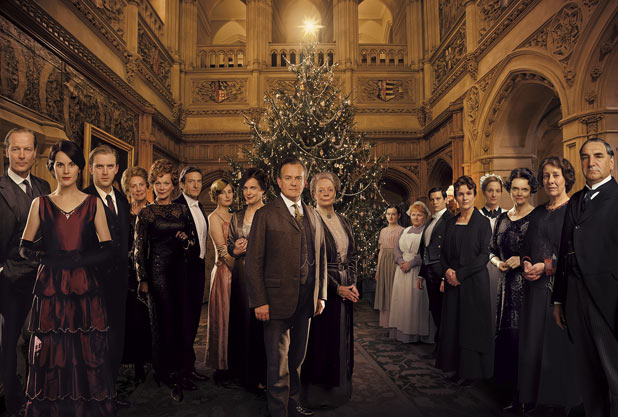
The Downton Abbey Christmas Special
 
 
Love Actually (to depress me)
 
 
Harry Potter (to cheer me up again)

Sunday, 11 August 2013

Christmas To-Do List: Decorations

 
This gorgeous garland from here. Even my crochet skills can stretch to this!
 
 
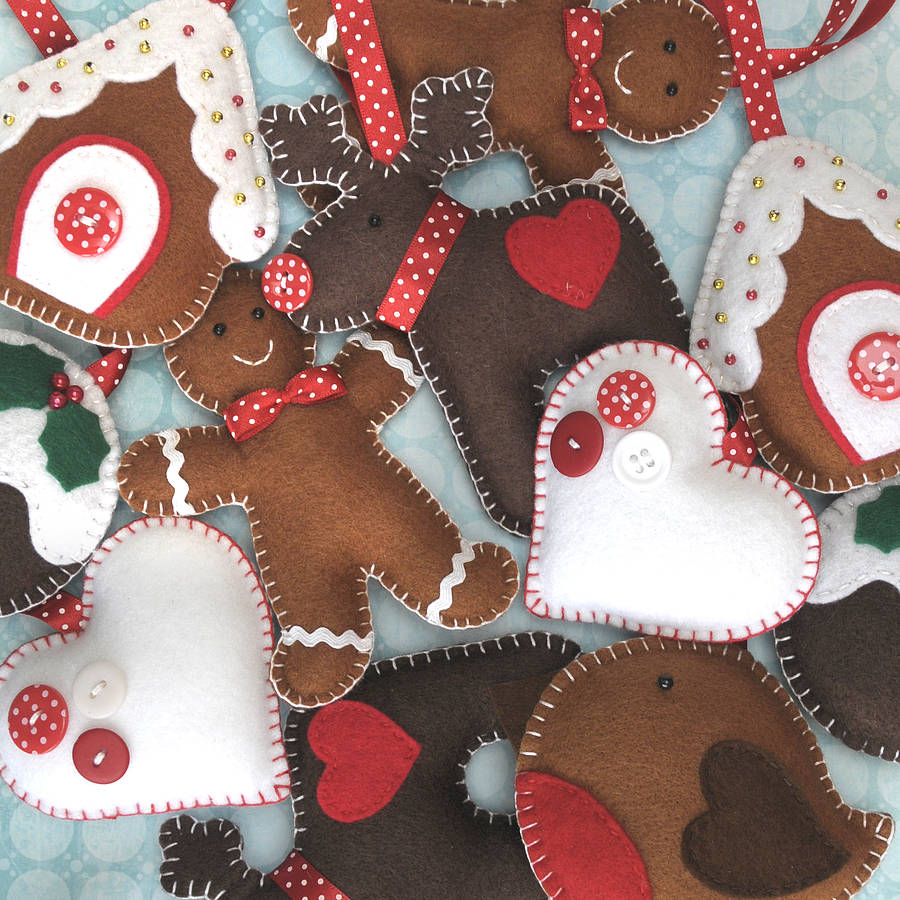
Perhaps something felt, like these cuties from notonthehighstreet.com
I love the gingerbread men!
 
 
Probably some of my felt hearts for the tree...
 
I can't remember where or when I picked up this image, but I've always wanted a Harry Potter Christmas. Someday that dream will come true.
 
Owls on the tree, house colours, stars, fairy lights, Weasley Jumpers... It would be perfect.
 
Keep dreaming, dearie!