Wednesday, 28 August 2013

Cheesy

When I was 13, I was a part of a school creative writing class. For Christmas, we had to write each other a story, like a Secret Santa, and it was allowed to be as cheesy as possible. I found it hilarious to write, as it just made no sense, it was clichéd and ridiculous.
 
Oh, and it had to begin with 'Once upon a time'...
 
Once upon a time, there was a girl. She had long, dark brown hair and twinkling brown eyes set into a round, olive toned face.  This girl could not feel the cold like others. She would run around her little village garden, in the snow with not a care in the world.
She played the violin too. She was so very talented with the small instrument; she could play for hours and hours. And it made such a wonderful sound.
One day, that little girl left her home country. It was late at night and she had already said her goodbyes. She packed away her violin and its bow and lifted the case. She walked slowly down the path and away. Away from the little green house that had been her home. She sailed across seas and past continents, searching. Searching for a place to belong.
It was a long, long time before anyone saw that girl again, several years, in fact. It was a group of explorers who had journeyed to the far south, to the Antarctic, that found her. They had never expected to find what they saw.
A huddle of penguins began to gather into a ring around a spot marked in the ice. They stood waiting, but all completely wild. The young explorers watched. And waited.
Suddenly, as if from nowhere, the girl padded across the snow, so silent with her bare feet. Her eyes were glazed, but there was a smile on her face. The young explorers watched fascinated by the girl who took her place among the penguins, who accepted her almost as brethren.
Slowly, softly, she took her violin and propped it on her shoulder. She began to play.
And the sky lit up with such an array of beautiful colours, pinks, blues, greens and yellows. The Aurora Australis.  The shimmering light patterns reflected in her hazel eyes and shone on her long brown hair. The adventurers watched the girl in awe. Secluded and lonely, silent but beautiful.  Here, was a girl who was at home. Here with the cold, the penguins, her violin and the light.


Tuesday, 27 August 2013

Camera Experiments: Knitting as a subject


I never quite realised how intriguing knitting was as a subject: texture, lines, colour....
 
And yes, I nearly forgot again, but didn't , so there we go.


Monday, 26 August 2013

My Favourite 10: TV shows

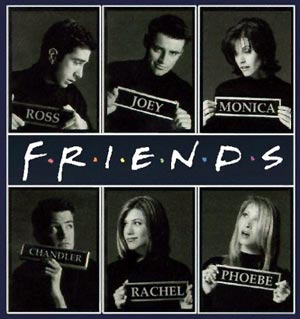
Friends
How can you not love Friends?! The story lines are funny, light-hearted, and there's a character everyone can relate to - I think I must be something like the third Geller child in my subconscious, as I am freaky about History like Ross, and like everything in its place like Monica!

 
NCIS
 Ah... McGee.... I'd never really watched a crime television programme before, so it surprised me that I liked this one. It may have something to do with the relation to the Navy, or the complexities of the characters - it's not just crime, their investigators are so cool! Abby is BRILLIANT.

 
JAG
Navy Again! I find this interesting as I was considering Law as a future option. Rabb and Mac does frustrate me, and I was annoyed when Chegwidden left, but they're funny, they're fluffy, and there are plot twists and good story lines.

 
M*A*S*H
You have already been on the receiving end of my M*A*S*H love if you are a long term reader here. They are quite possibly the funniest shows I have ever seen, admittedly from the 70s, but there is nothing wrong with that. Oh and guess what, it's the military again!

 
Doctor Who
How can you not love Doctor Who? It's a shame that Matt Smith is leaving, I don't feel the writers were good enough to give the same chance to shine as David Tennant did. Mind you, it must have been hard for him, trying to follow that up. Doctor Who is at its best when it scares you - I prescribe anything with Weeping angels.

 
Sherlock
Benedict Cumberbatch is fantastic, and the effects are amazing, when you see the calculations that run through his head scroll across the screen. Sherlock Holmes is one of those classic characters, and Benedict brings him perfectly to life in a contemporary setting.

 
Downton Abbey
The love affair continues despite the cruelty of Julian Fellowes. Gorgeous costumes, characters and stories, it was unfortunate that my favourite (Sybil) died. I was rooting for her and Branson right from the start. It's one of those series where you get so enthralled, you want to live and be a part of it, if only as an observer into that world.

 
QI
General Knowledge, Stephen Fry, and occasionally something about a Blue Whale, Alan? Marvellous.

 
Kirstie Allsopp's assorted craft programmes
I could hardly write a craft blog if I didn't enjoy these. She's got a bit more into the Vintage area now, but I especially adored her Handmade Christmas series. They're all brimming with ideas and beautiful images.
 
The White Queen
Oh Wow. I love it. The history, the costumes, the strength of all of the female characters, Aneurin Barnard... I fell for it hook, line and sinker. Next up, the books! (Yes, I know, I've done it in the wrong order but I didn't think that I would love it this much!)


Sunday, 25 August 2013

25th: Christmas Card 8

This is the last of my last year's Christmas Cards, I hope to get this year's done before this time next year!
 
Equipment:
White Card
Candy Cane embellishment
Corresponding Striped Paper
Foam Pads
Outline stickers
 
1) Fold the White card to an A5 Card Blank.
2) Trim another piece of white Card to fit the candy cane. Attach the candy cane with foam pads.
3) Trip a piece of the striped paper to matt the candy cane panel. I usually trim so that there is a 0.5 cm border around. Attach the panel with foam pads.
4) Arrange the stack of paper in the top right corner of the card and attach with foam pads.
5) Below, add a sticker with the words 'Christmas'

This one is simple but effective, I think. I like how the stripes match.

Apologies for yesterday...

I failed my challenge.
 
I got back from my holiday late on Thursday, and spent Friday running around, speaking to my form tutor about my As Results (put it this way, I'm not going to Cambridge. But they're not horrendous),and then my first driving lesson. And yesterday I got caught up in writing my History Coursework and it completely slipped my mind.
 
I'm sorry.
Not much lost, really, but I'm sorry.
I hope to finish the rest of this challenge blip-free.

Friday, 23 August 2013

Camera Experiments: Pylons


The large, imposing structures of telegraph pylons on our landscape..... Strangely beautiful... Eerily cold and unfeeling.
 
The fear of walking under one as thunder rolls behind you.
Oh what we do for art.


Thursday, 22 August 2013

Guest Post by Katie at Running With A Glue Gun

Hey! Today I have something very special for this little blog: it's very first guest post! I'm so very excited, but for now, I'm just going to pass over to Katie.
 
 
Hello Everyone,
I'm so excited to be guesting blogging at Crafts From A Ravenclaw. My name is Katie and I write little blog call Running With A Glue Gun. Today I will be showing you guys how to make your own mini moon banner.

So Lets Get Crafty!

Supplies
9 Round Wooden Circles
Black Paint
Grey Paint
Paint Brush
Drill
Embroidery Thread
Scissors (not pictured)


Step 1: Drill two small holes on each side of your wooden circles.


Step 2: Then paint all of your wooden circles black.


Step 3: Once your circles are dry, go and google ''phases of the moon''. When you find a picture/chart that shows each moon phase, print it out. This will help you keep track of what each phase looks like.

Then begin painting each moon phase with your grey paint. I also added a little bit of grey glitter to give my moons some sparkle.


Step 4: When your moons are dry, you can then start connecting them together. To do that, just cut a small piece of embroidery thread and feed each end through the back of two of your wooden circles. Then tie a knot in the front. Keep repeating this step until all your moons are connected.

Once all your moons are connected, go and add some embroidery thread to the ''black''moons on each end of your banner. This will create the loops to hang your banner.

Then Your Done!

I hope you all enjoy the diy and thanks Rachel for letting me guest post!
 
Isn't it gorgeous? As a physics student, I love it, but it's equally as mystical as it is geeky. Thank you so much, Katie!